 TestOwl
Masking Rules
Test runs can capture screenshots and videos to help you debug failures and understand execution flow. However, these artifacts may contain sensitive information such as customer details, payment data, or internal business metrics.
Masking Rules allow you to hide specific areas of the page in captured screenshots and videos while keeping the actual test execution unchanged. The test can still interact with, read, and validate the original page content.
Creating a masking rule
To create a masking rule:
- 1Open Settings from your project.
- 2Navigate to the Security & Privacy tab.
- 3Click New Rule.
- 4Enter a unique Rule Name.
- 5Select the Rule Type:
- Text — Masks elements containing matching visible text.
- CSS — Masks elements matching a CSS selector.
- XPath — Masks elements matching an XPath expression.
- 6Enter the corresponding Value based on the selected rule type.
- 7Save the masking rule.
The rule will be available for selection when configuring an environment. Once applied to an environment, it will automatically affect future test runs where screenshots or videos are captured.
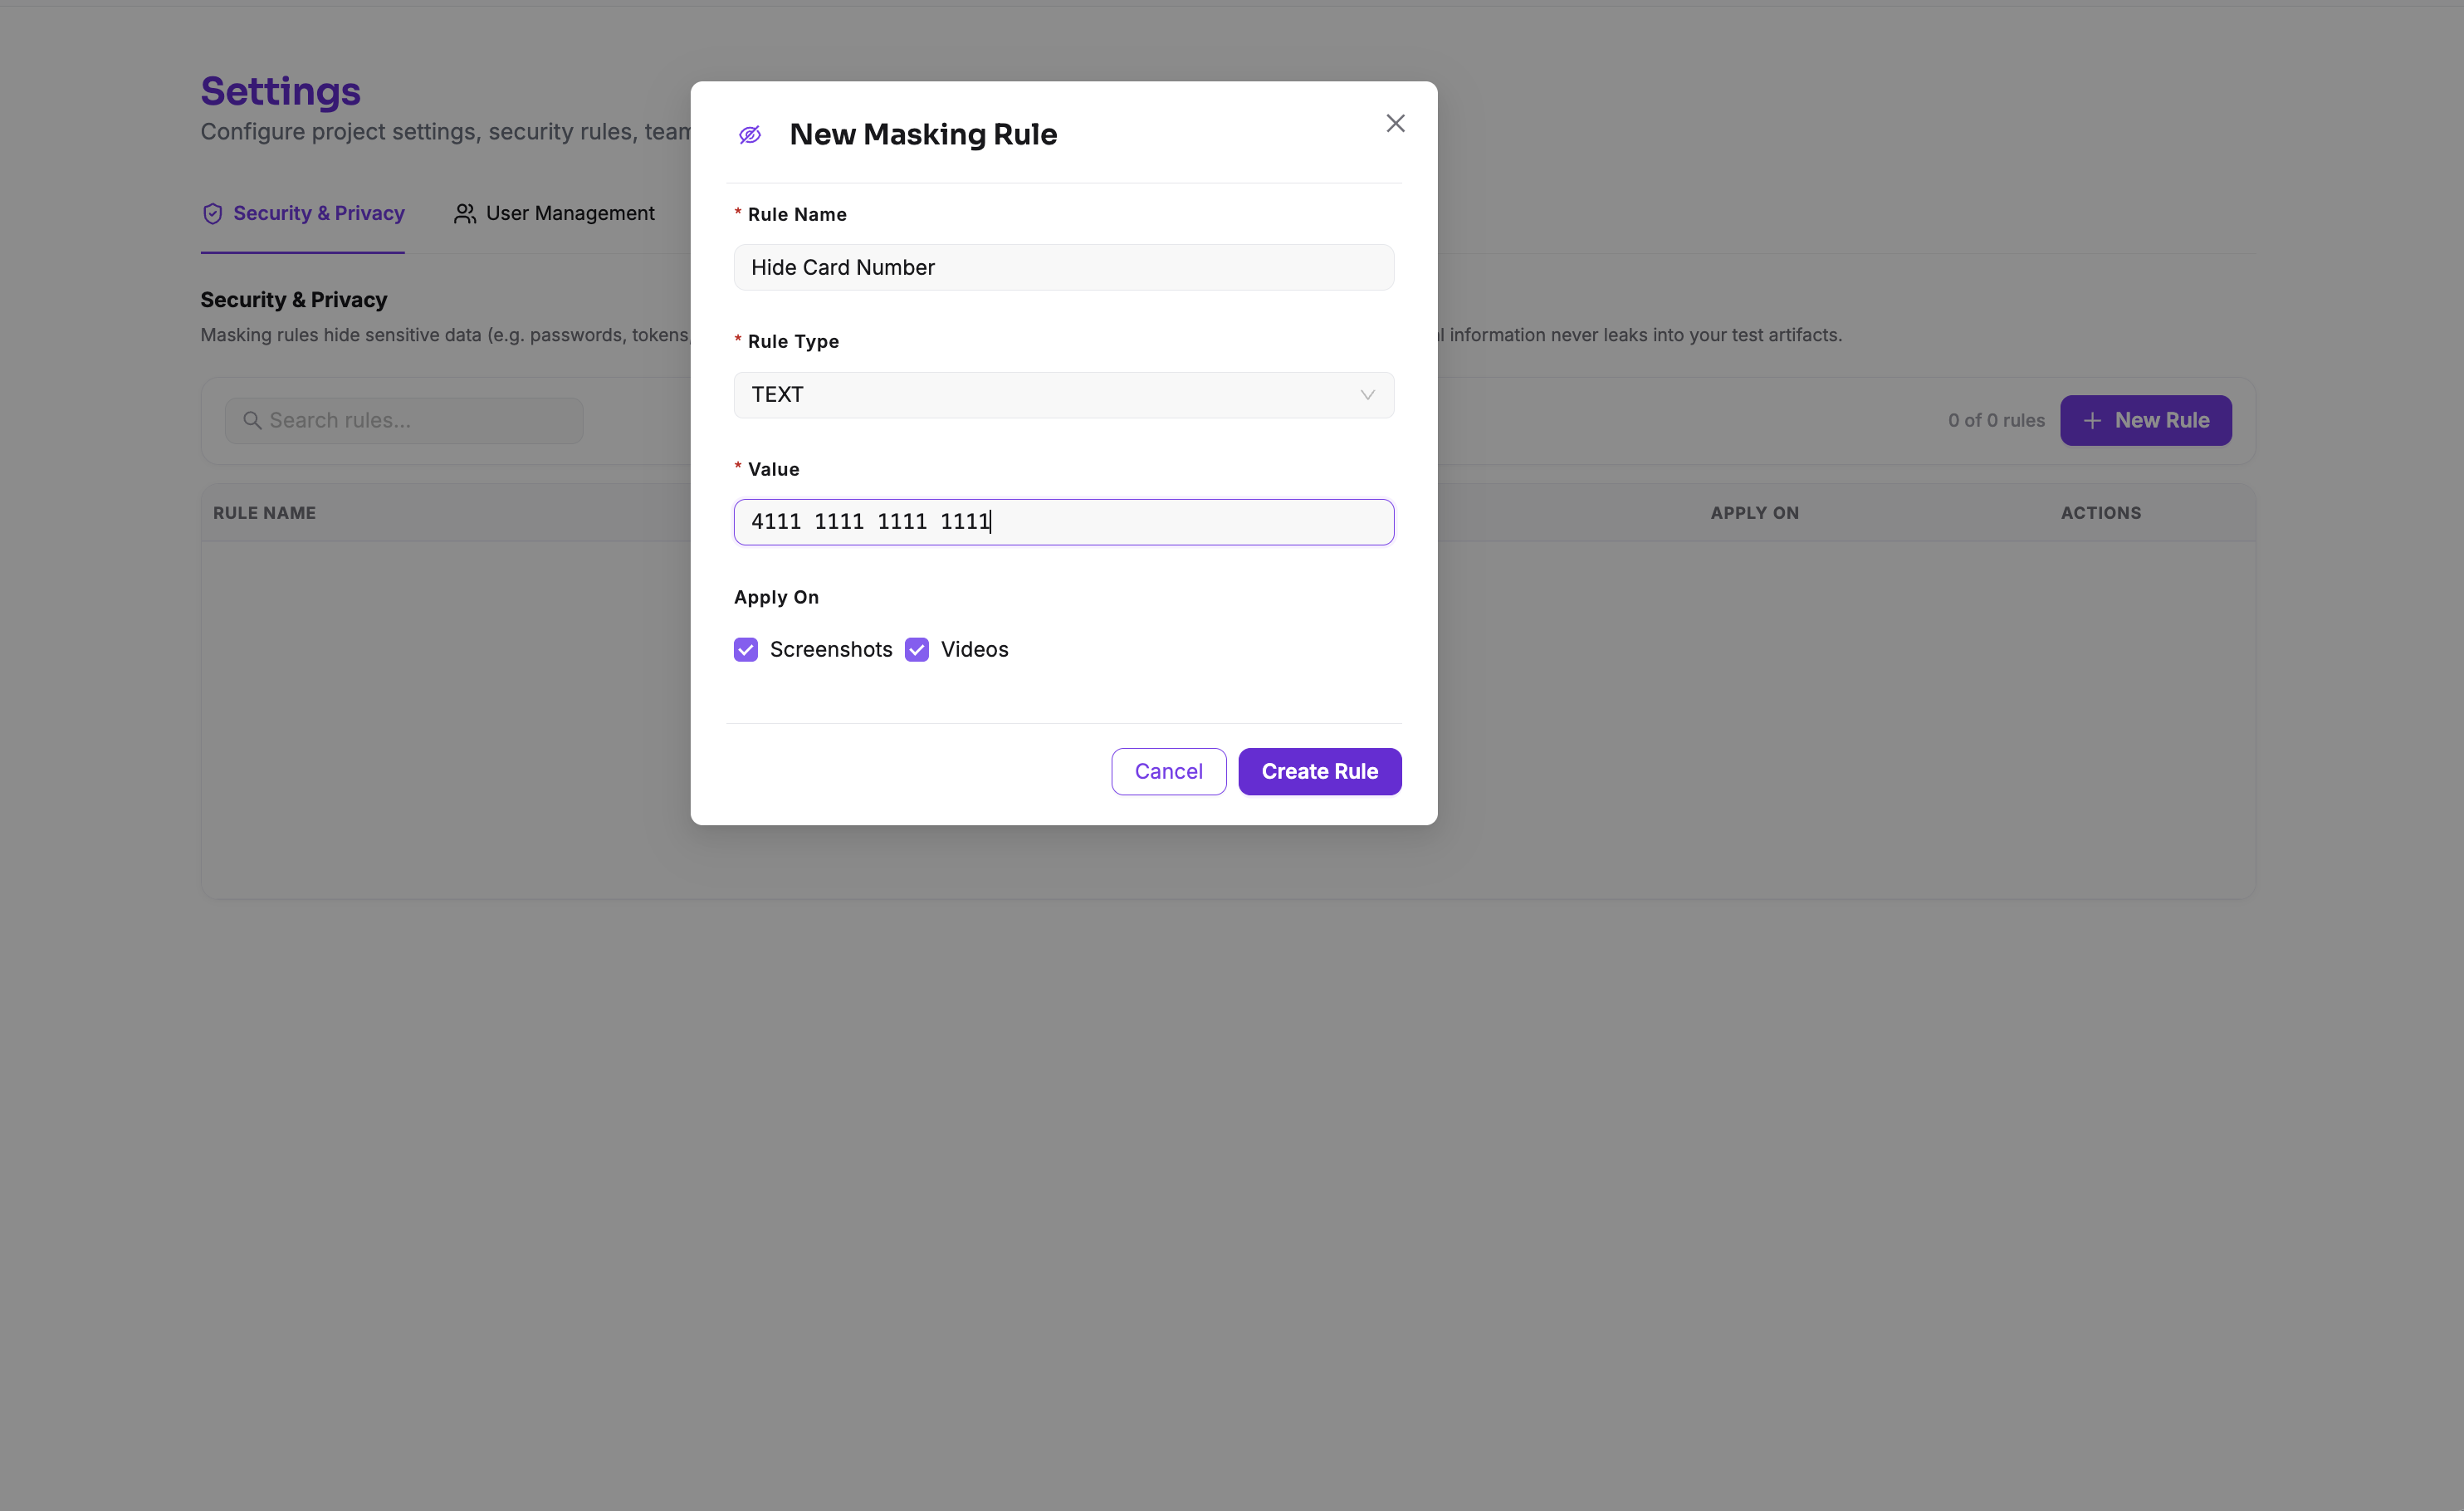
For example, to mask a Card Number field:
- Rule Name: Hide Card Number
- Rule Type: TEXT
- Value:
4111 1111 1111 1111
Rule types
Masking Rules identify elements using one of the following rule types:
| Rule Type | Matches by | Example |
|---|---|---|
| Text | Visible text content on the page | Customer Email |
| CSS | CSS selector | .customer-email |
| XPath | XPath expression | //div[@class="user-profile"] |
Choose the rule type that best matches how the sensitive element can be identified in your application.
What masking does (and doesn't) do
Masking only affects captured screenshots and videos generated during a test run.
It does:
- Replace the matched page area with a visual redaction in screenshots and/or videos.
- Prevent sensitive information from appearing in shared test reports.
- Apply automatically during artifact generation for environments where the rule is configured.
It does not:
- Modify the actual webpage.
- Change the data available to the test.
- Prevent the test from clicking, reading, or asserting against the masked element.
- Change application behavior during execution.
Where masking rules apply
Masking Rules are applied at the Environment level.
When creating or editing an environment, you can select the masking rules that should be applied to that environment.
Once a masking rule is selected for an environment, it will automatically apply to future test runs executed in that environment where screenshots or videos are captured.
Masking Rules are not applied retroactively. Existing reports and previously captured screenshots or videos will remain unchanged. The selected masking rules will only affect new test runs after they are configured.
Recommended use cases
Masking Rules are useful when your tests capture pages containing sensitive or confidential information, such as:
- Login pages containing real user names or email addresses.
- Profile pages displaying customer information.
- Checkout flows containing payment-related details.
- Admin dashboards showing internal metrics or business data.
- Reports containing confidential company information.
Best practices
- Prefer stable CSS selectors when possible.
- Avoid masking large sections of a page unless necessary, as it can make debugging harder.
- Create separate rules for different types of sensitive data.
- Review masking rules whenever your application's UI changes.