 TestOwl
Quickstart
By the end of this guide, you'll have:
- A project
- Your first recorded test
- A successful test run
- A report showing the execution results
Before you begin
Make sure you have:
- A TestOwl account
- A project
- The TestOwl Desktop App installed
- The URL of the web application you want to test
Step 1: Start a recording
Open your project and navigate to the Home page.
Enter the URL of your application and click Record.
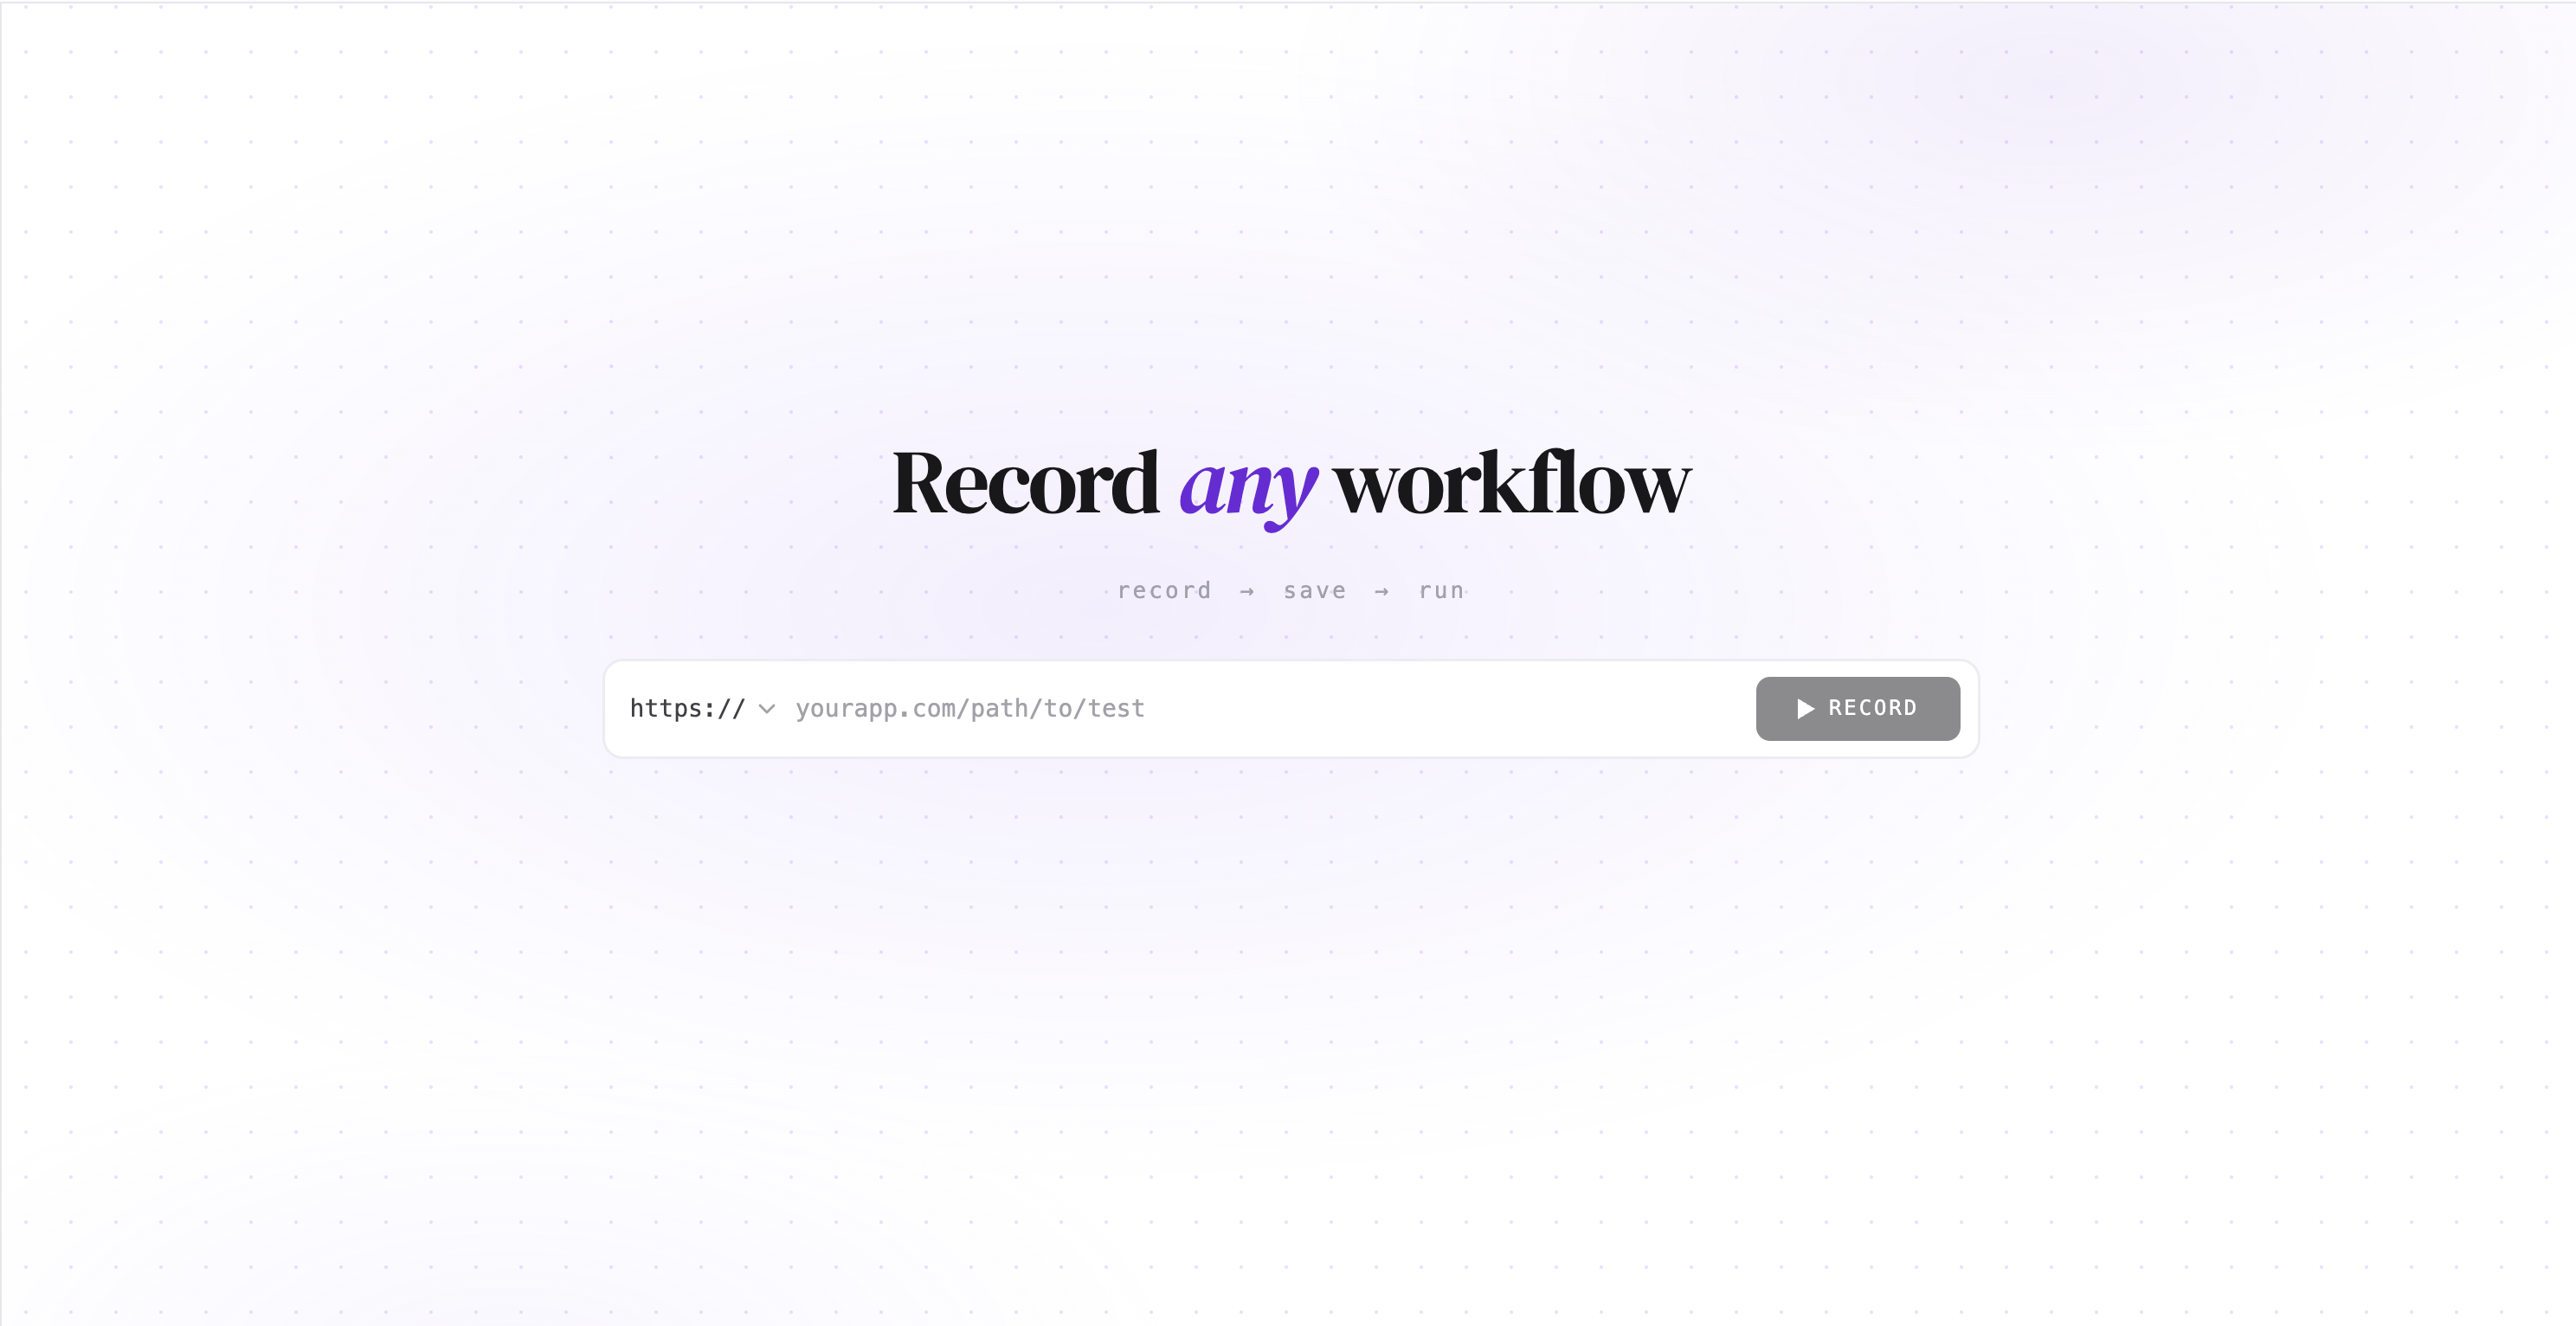
TestOwl launches your application and begins recording every interaction you perform, including clicks, typing, navigation, scrolling, assertions, and other supported actions.
Continue using your application exactly as an end user would.
For example:
- Sign in
- Search for a product
- Add an item to the cart
- Complete checkout
When you've finished, stop the recording.
Step 2: Review and save your test
Every recorded action becomes an editable test step.
Review the generated steps and make any changes you need.
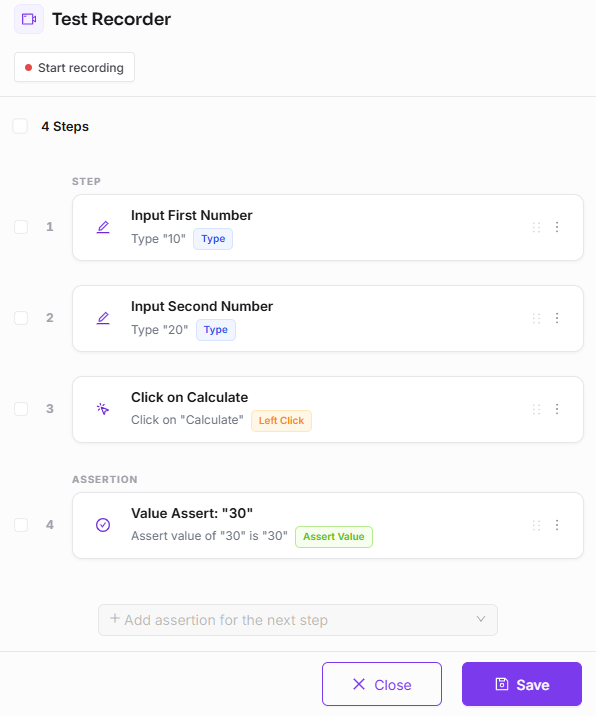
You can:
- Edit step properties
- Reorder steps
- Delete unnecessary steps
- Add additional steps
- Configure assertions
When you're happy with the recording, save it as a Test Case.
If you don't already have a Test Suite, create one and save your test inside it.
As your test library grows, Test Suites help organise related test cases.
If part of your recording will be reused in multiple tests—such as signing in—you can later extract it into a reusable Flow.
Step 3: Choose an environment and run your test
Click Run and select the Environment where you'd like the test to execute.
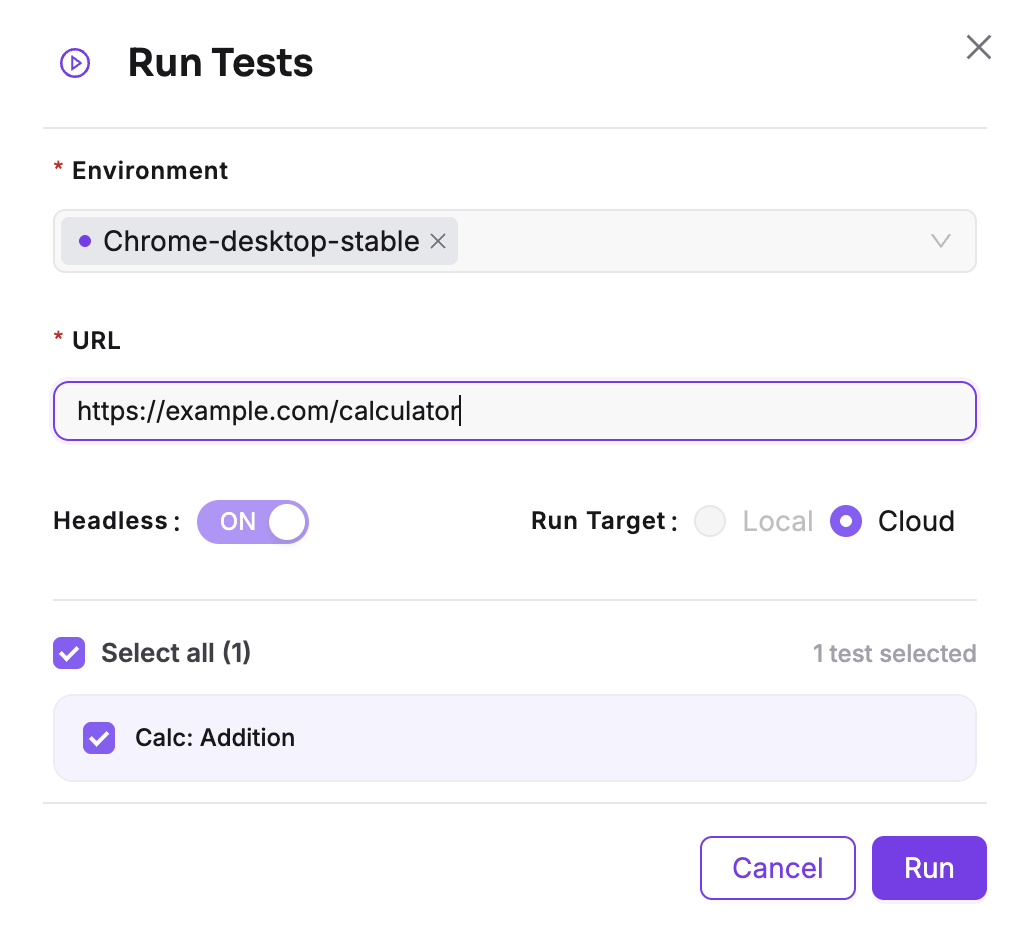
An environment defines settings such as:
- Browser
- Device
- Locale
- Network conditions
If you haven't created an Environment yet, create one before running your test. An environment defines where and how your test executes, including the browser, device, locale, and other runtime settings. See Environments to create your first environment.
Choose whether to execute the test:
- Locally using the TestOwl Desktop App
- In the cloud
The run starts immediately and appears in Run History.
Step 4: Review the results
Once the run finishes, open it to view the execution report.
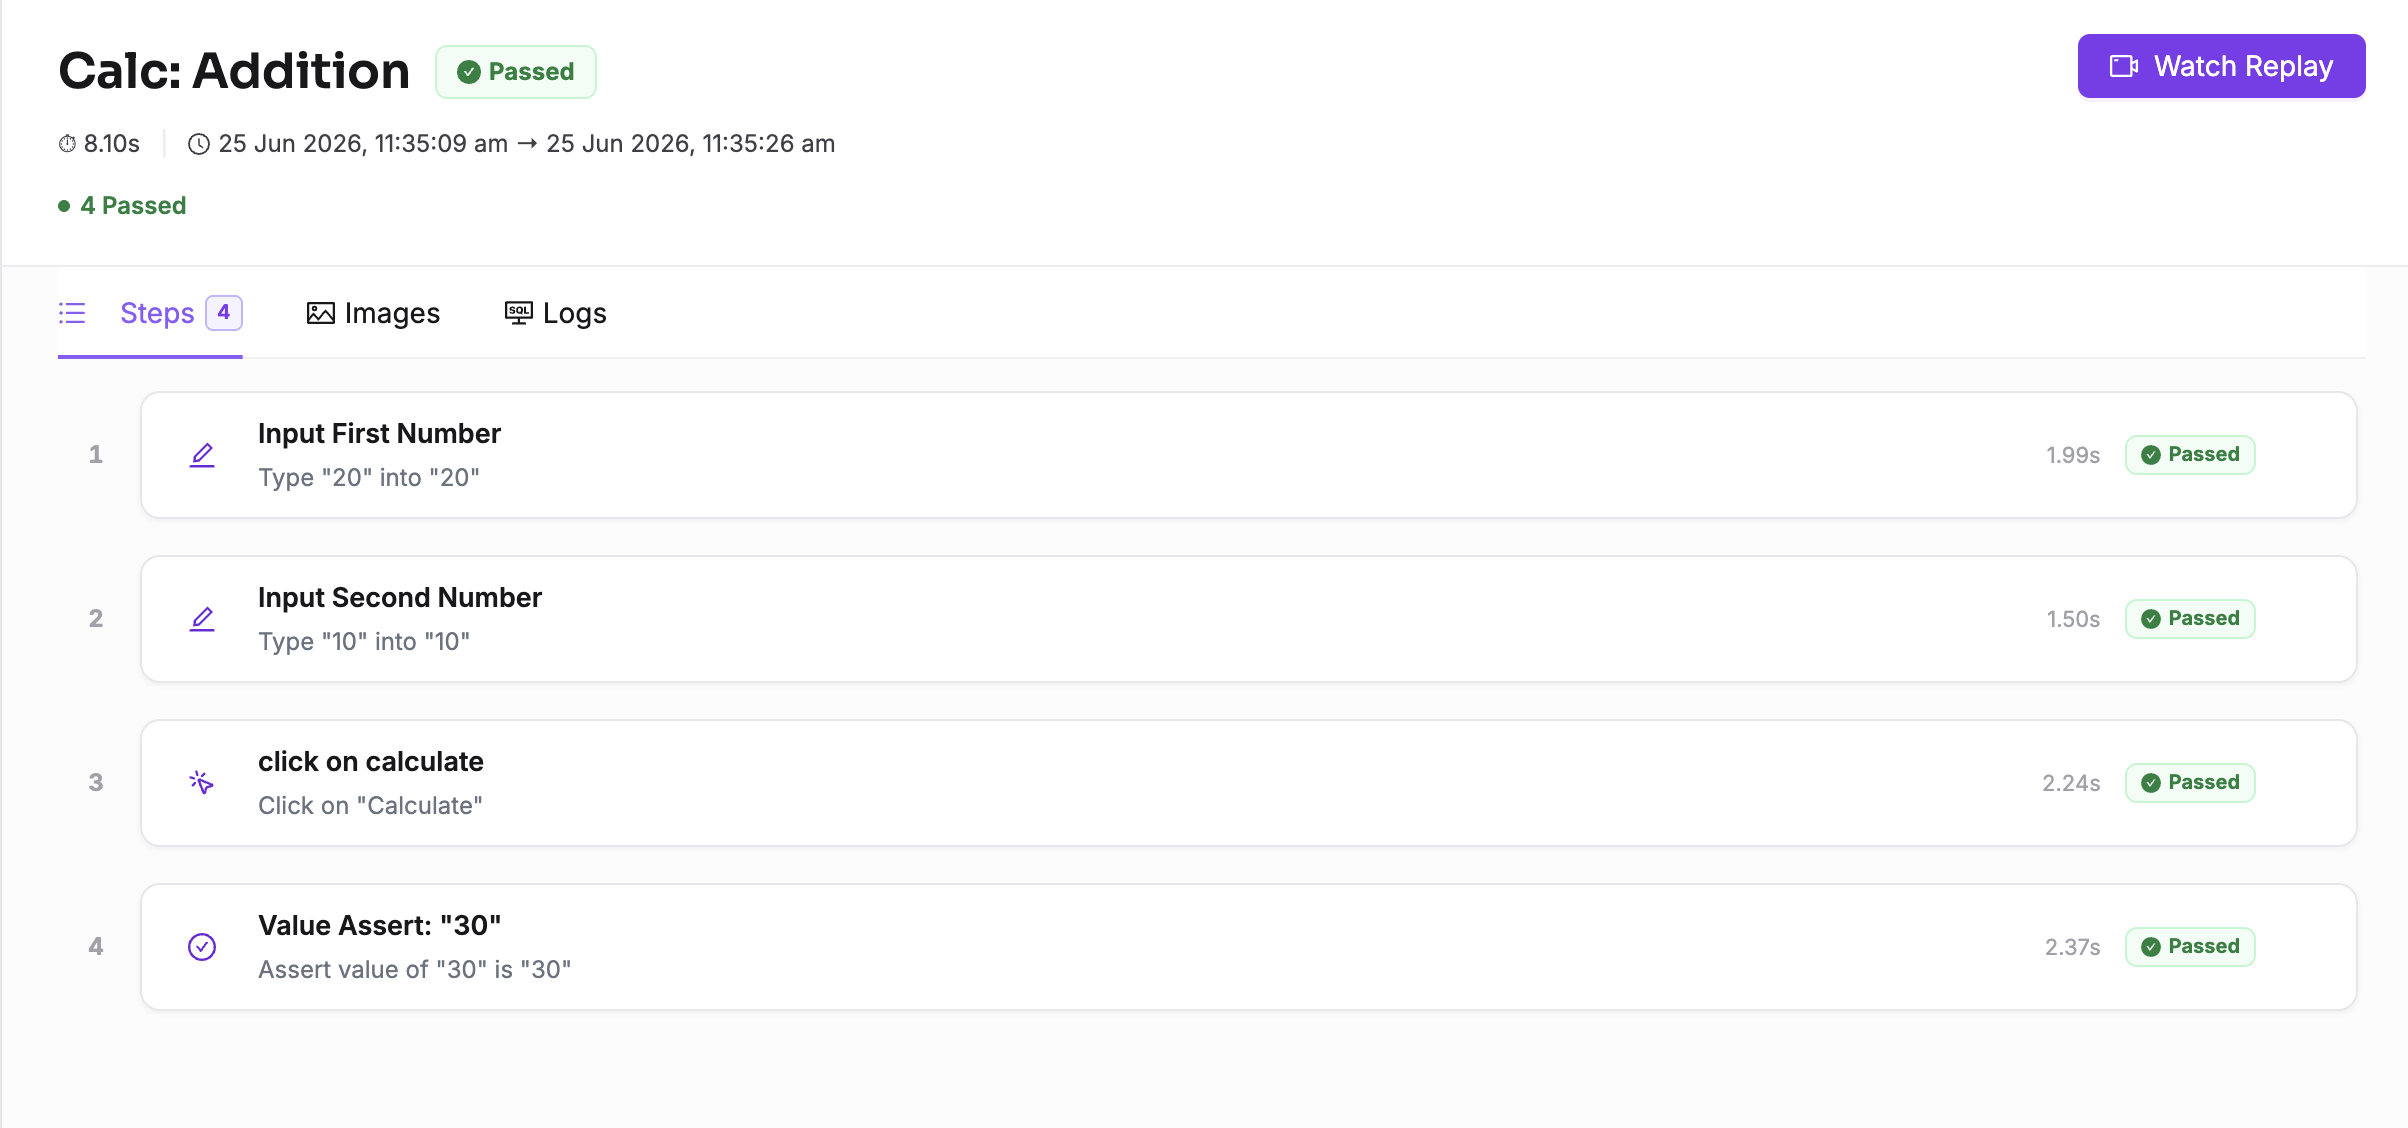
The report includes:
- Overall pass/fail status
- Step-by-step execution results
- Screenshots
- Video recording
- Network logs
- Console logs
- Error details
Use this information to understand exactly what happened during the test run and quickly investigate failures.
Congratulations!