 TestOwl
Inviting Team Members
Invite teammates to collaborate on your project by assigning them an appropriate project role.
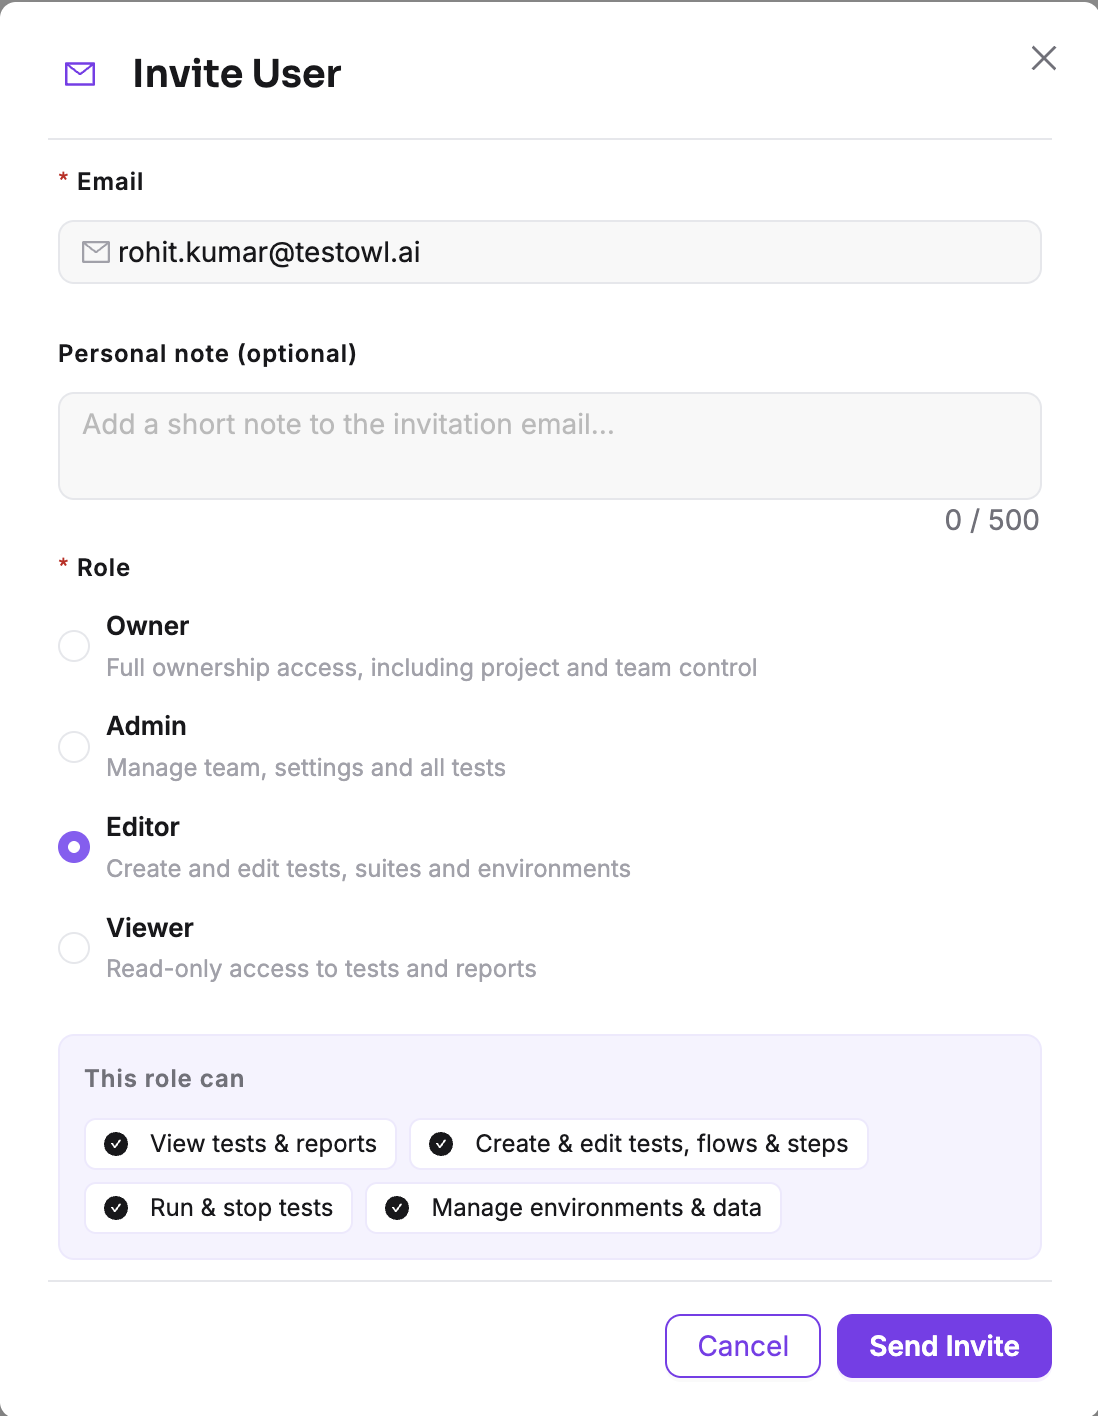
Inviting a team member
To invite a new member:
- 1Open Settings from your project.
- 2Navigate to the User Management tab.
- 3Click Invite User.
- 4Enter the user's email address.
- 5Select a project role:
- Owner
- Admin
- Editor
- Viewer
- 6Click Send Invitation.
The invited user receives an email containing a link to join your project.
What happens after sending an invite
When the recipient opens the invitation link:
- If they already have a TestOwl account using the same email address, they simply sign in and join the project.
- If they don't have an account yet, they create one using the same email address, and the invitation is accepted automatically after signup.
For more information about account creation and authentication, see Account & Authentication.
Use the same email address
The invitation must be accepted using the same email address that received the invitation email.
Project roles
Choose the appropriate role before sending an invitation.
| Role | Description |
|---|---|
| Owner | Full ownership access, including project and team management. |
| Admin | Manage team members, settings, tests, environments, and project configuration. |
| Editor | Create and edit test suites, test cases, flows, and environments. |
| Viewer | Read-only access to project resources and reports. |
See Project Roles for a detailed explanation of each role.
Managing members
Project Owners and Admins can:
- Invite new members.
- Change member roles.
- Remove members from the project.
Only the Owner can transfer project ownership to another member.